I have chosen the better of the two boxes given the space limitation. And yes, the box design made it look nicer and more functional, inside the helmet. However, if you need to adjust the timing, you would need to peel the box off as the screws as they are on the other side. OK, so I don't have a drill to make a nice hole in the box and put it a panel version of a variable resistor (maybe version two, perhaps?). And bear in mind, the 9v battery (Batteries not included. I always wanted to say this) holder would be on the outside. This is a new design that I came across and after testing it about, the battery would not come off so easy, unless you get whacked by Dart Vader.
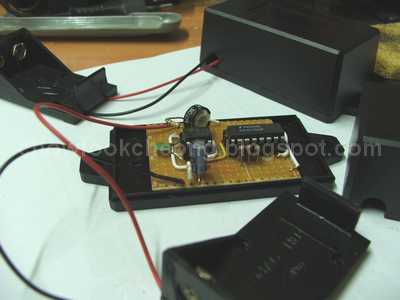
Never underestimate the effectiveness of a stripboard!
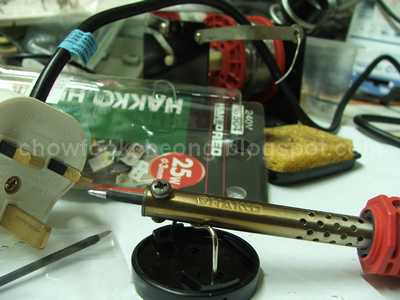
This is also a good time to try out my new soldering iron!
When it is new, you need to let it stand for 10 minutes or so as it
needs to burn off some coating inside it. So, don't be afraid of
smoke coming out. This is a RM28 25Watt soldering iron and
it even came with a cute little stand. But after some bargaining,
I got the iron and a spare bit for only RM30! Ha ha ha ha ha ha!
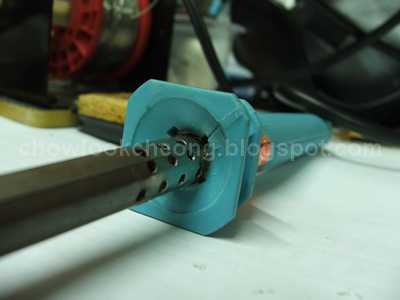
This is much better than my RM6 soldering iron as my original
(just like pne above) was taken by my technician. So, after
about a few minutes of use, the plastic starts to melt and it
became too hot to hold. See the melted iron? Compared
my original (and also above) Soldering Irons, I can keep
them on for hours and still there is no problem. Well,
lets see how this one develops