I just got back the four pieces of acrylics today and I am so over the moon! They used transparent acrylics because its more common and cheaper, I guess. It felt so nice to hold them too.
Anyway, there are a few things I noticed but I'll let the pictures tell you. So, I guess I have to go to Phase II which is to R&D on the Electronics. I have more or less decided what I want to do with the project now, and I'll go in stages. But I think this project is further set back maybe end 2006 and not in six months time as most fo the cash I am saving are now going towards car repair (RM1000) and the coming Chinese New Year Ang Pows (the price of getting married). So, I am crossing off the checklist now:
1) PADD Design - Done
2) Electronics to light up the view area - Started on research
3) Electronics to control the LEDs - Waiting
4) Electronics to control the switching On/Off - Waiting. Need RM400
5) Battery issue - Waiting. Need to look at current batteries available
6) Redesign of PADD actrylic due to fitting of Electronics - Oh, shit. This is getting to be expensive
7) Viewscreen design - I have absolutely no idea on this yet
8) Types of spray paints that does no react with the acrylics years from now - Ha ha ha ha ha
9) The correct colours for the PADD - Not easy in Malaysia
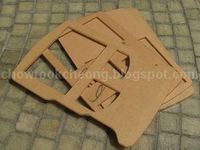
Here they are! All accurately cut
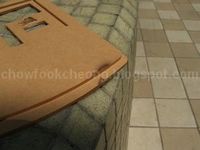
I noticed some burnt marks....

And three pieces have small melted "dents" in them, most probably where the laser starts and stops

And maybe there was a problem cutting one of the holes
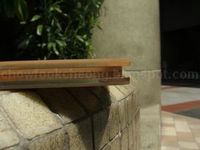
Four laters, but the second layer (from the top) is supposed to be 1mm thick
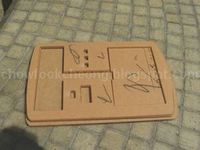
View of the middle layer
See the square hole on the left?
If the electronics are OK, then this will be the slot for the Optical Isolinear Chip at the size of (2.4 x 8cm)

OK, this is roughly what it looked like when I arranged them
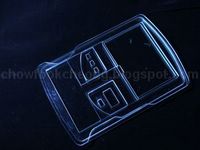
Hee hee hee. I couldn't resist!
As soon as I got home, I tore away the paper backing and stacked them
But there were a lot of dust and the acrylics were scratched

Here is another shot. Almost like an X-Ray image
Reference:
If you'd like to have an ultra accurate PADD kit, you can contact Matthew Munson at matthewmunson_@_yahoo.com (You need to remove the "_" from the E-Mail first as these spam bots are nasty). And, if you like to have THE ULTIMATE PADD that has lights and sound, you can give Gerhard Mros a call at gmros@cogeco.ca and you will not be disappointed.
If you'd like to have an ultra accurate PADD kit, you can contact Matthew Munson at matthewmunson_@_yahoo.com (You need to remove the "_" from the E-Mail first as these spam bots are nasty). And, if you like to have THE ULTIMATE PADD that has lights and sound, you can give Gerhard Mros a call at gmros@cogeco.ca and you will not be disappointed.
No comments:
Post a Comment